Precise Installation

STEP 1 | Corresponding points of sit bones when fitting

The blue area is the corresponding point of the sit bones when fitting.
Please keep your sit bones in this position at all times during the fitting process.
You will feel like you are sitting on a railing.
STEP 2

When the sit bones corresponding points of All-wings are aligned with the sit bones corresponding points of the traditional saddle, the effective adjustment ranges of the 2 saddle rails also completely overlap. Before removing the original saddle, it is recommended to make a preliminary comparison of the front and rear reference positions to be installed.
STEP 3

When installing for the first time, it is recommended to take the bottom of the rails as a horizontal angle.
STEP 4 | Set saddle height

When you sit in the correct position on the saddle, align your heels with the axis of the pedals, step the pedal to the bottom and your legs can be fully straightened and you feet can firmly step on the pedals. The height of the saddle at this moment is the ideal height. Generally, after installing All-wings saddle, you need to lower the seatpost by 3 cm so that the legs will be close to your original extension angle when pedaling. For those who are using All-wings saddles for the first time, we recommend lowering the height by 0.5~1cm from this point. It will take it easier for you to adapt to All-wings in the early stage, and then adjust the height by 0.5 cm every 50 kilometers until you feel the smoothest pedaling action.
After the cycling shoes are buckled, the thighs and calves are slightly curved, about 145°.
STEP 5 | Set the saddle's front and rear position

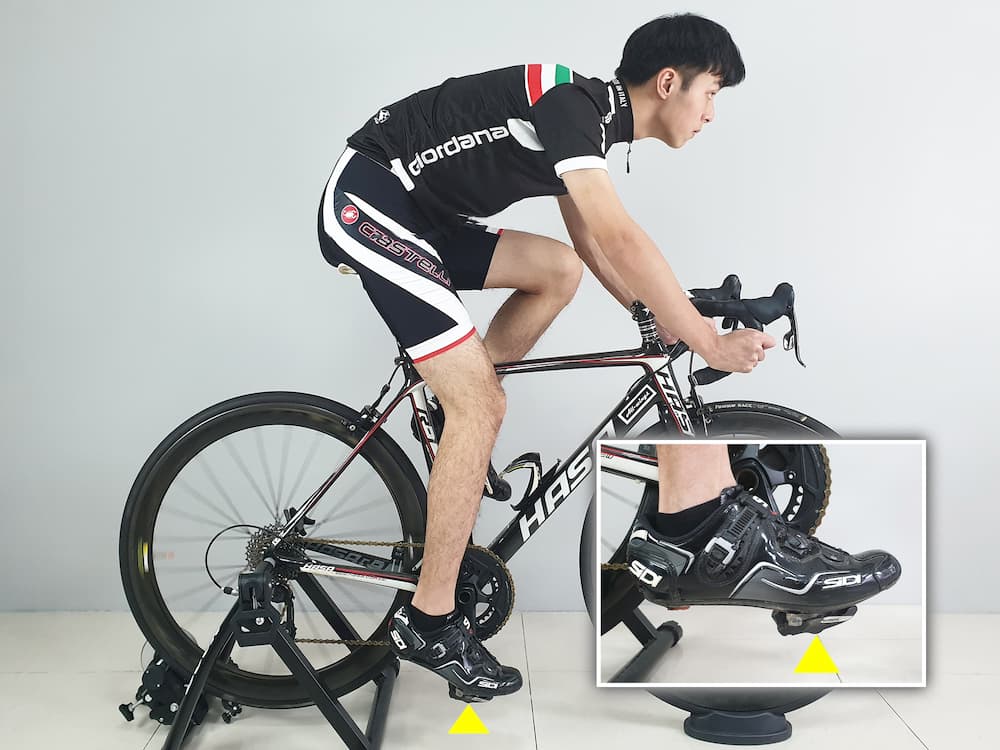
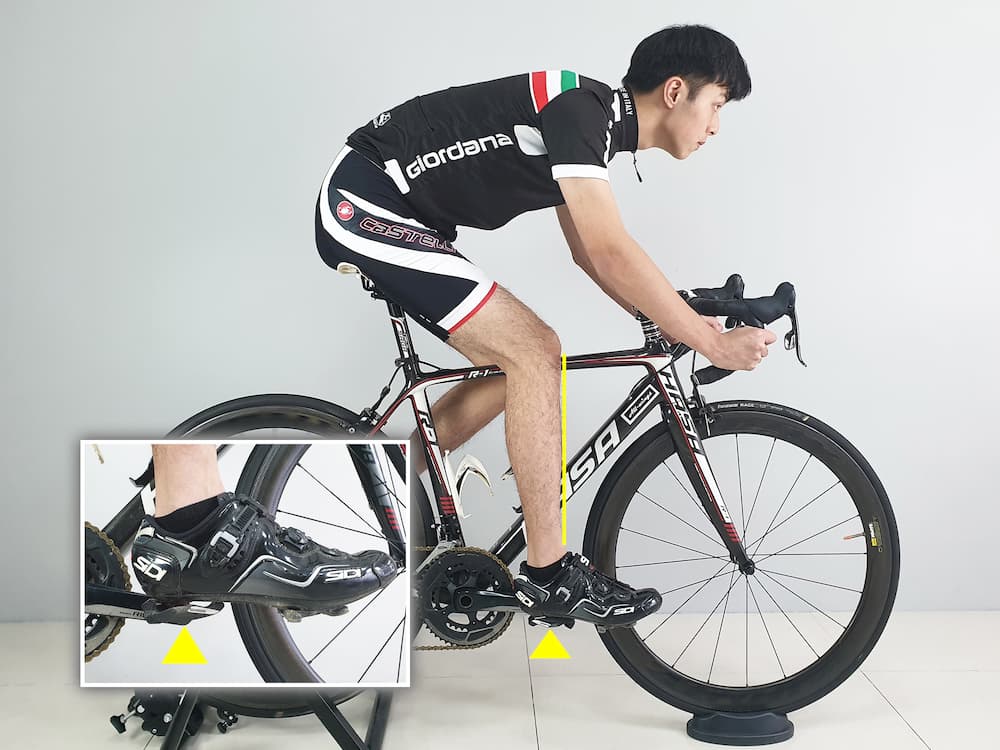
After you sit in the correct position on the saddle, keep the pedal at the 3 o'clock position, and then step on the central axis of the pedal with your heel. The front edge of your calf should be perpendicular to the ground. At this moment, the front and rear position of the saddle is the ideal position.

During the test ride, you can fine-tune it forward or backward within about 1 cm based on your personal feelings and riding habits.

After the cycling shoes are buckled, the straight line of the front edge of the calf should approximately form an angle with the plumb line of the front edge of the calf as shown in the figure above. At this step, the geometric settings below the waist are roughly completed.
STEP 6 | Set the distance of the cockpit

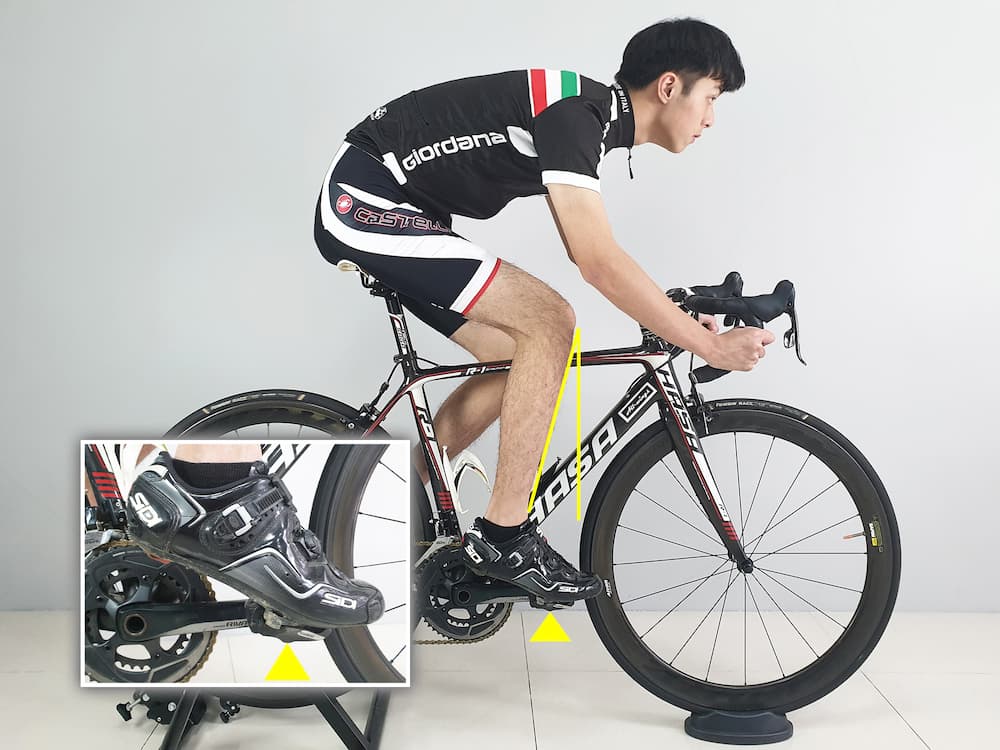
After completing the settings in step 5, your back should be able to arch the cat's back, the elbows should be slightly bent, and your both hands should be able to easily hold the brake hoods.

The main center of gravity should remain on the hips. The ideal pressure distribution should be Hip 90 : Arms 10 : Legs 0

At this step all settings have been completed.

If there is too much pressure on your arms and shoulders when you hold the brake hoods, or if your arms or shoulders tend to feel numb after riding, it means that the cockpit is too long. The saddle should not be moved forward at this moment, but replace the shorter stem.

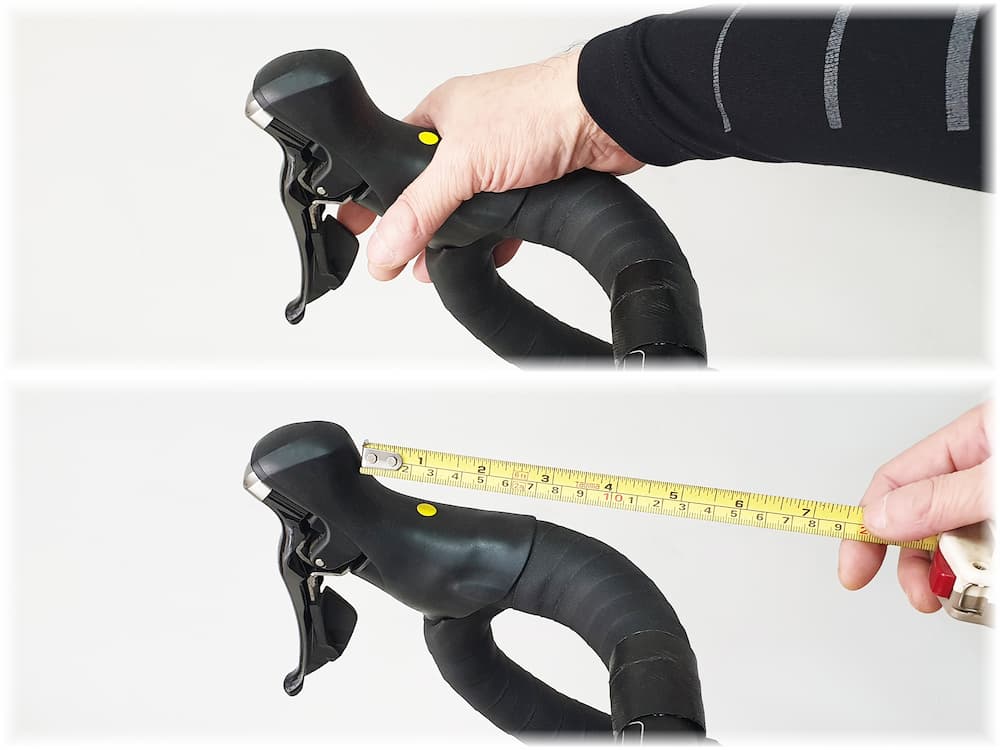
Reference/Simple method for measuring stem length

Mark spots on the handlebars and do a test ride on the road to find where there is less pressure on your arms and shoulders.

Measure the distance from the marked point to the brake hoods. The distance is the size by which the stem should be shortened.